Last November, a designer I consulted lost $8,400 on a production run because they misunderstood a single comment on a fit sample. It’s a common story in this industry. I know the apparel sampling process often feels like an expensive cycle of trial and error, filled with confusing jargon like PP and TOP that leaves you second-guessing your overseas partners. You’re likely tired of wasting weeks on revisions that don’t seem to get the fit right or capture your vision.
My goal is to change that by sharing the exact framework I’ve used over the last 15 years to scale brands here at Darlon Garment. I’ll walk you through every stage from the first prototype to the final production-ready sample so you can manufacture with total confidence for your 2026 launch. We’re going to examine how to review samples effectively and the specific technical benchmarks required to transition into bulk production without a single shipping delay. By the end of this guide, you’ll have a clear roadmap to navigate the factory floor like a seasoned industry veteran.
Key Takeaways
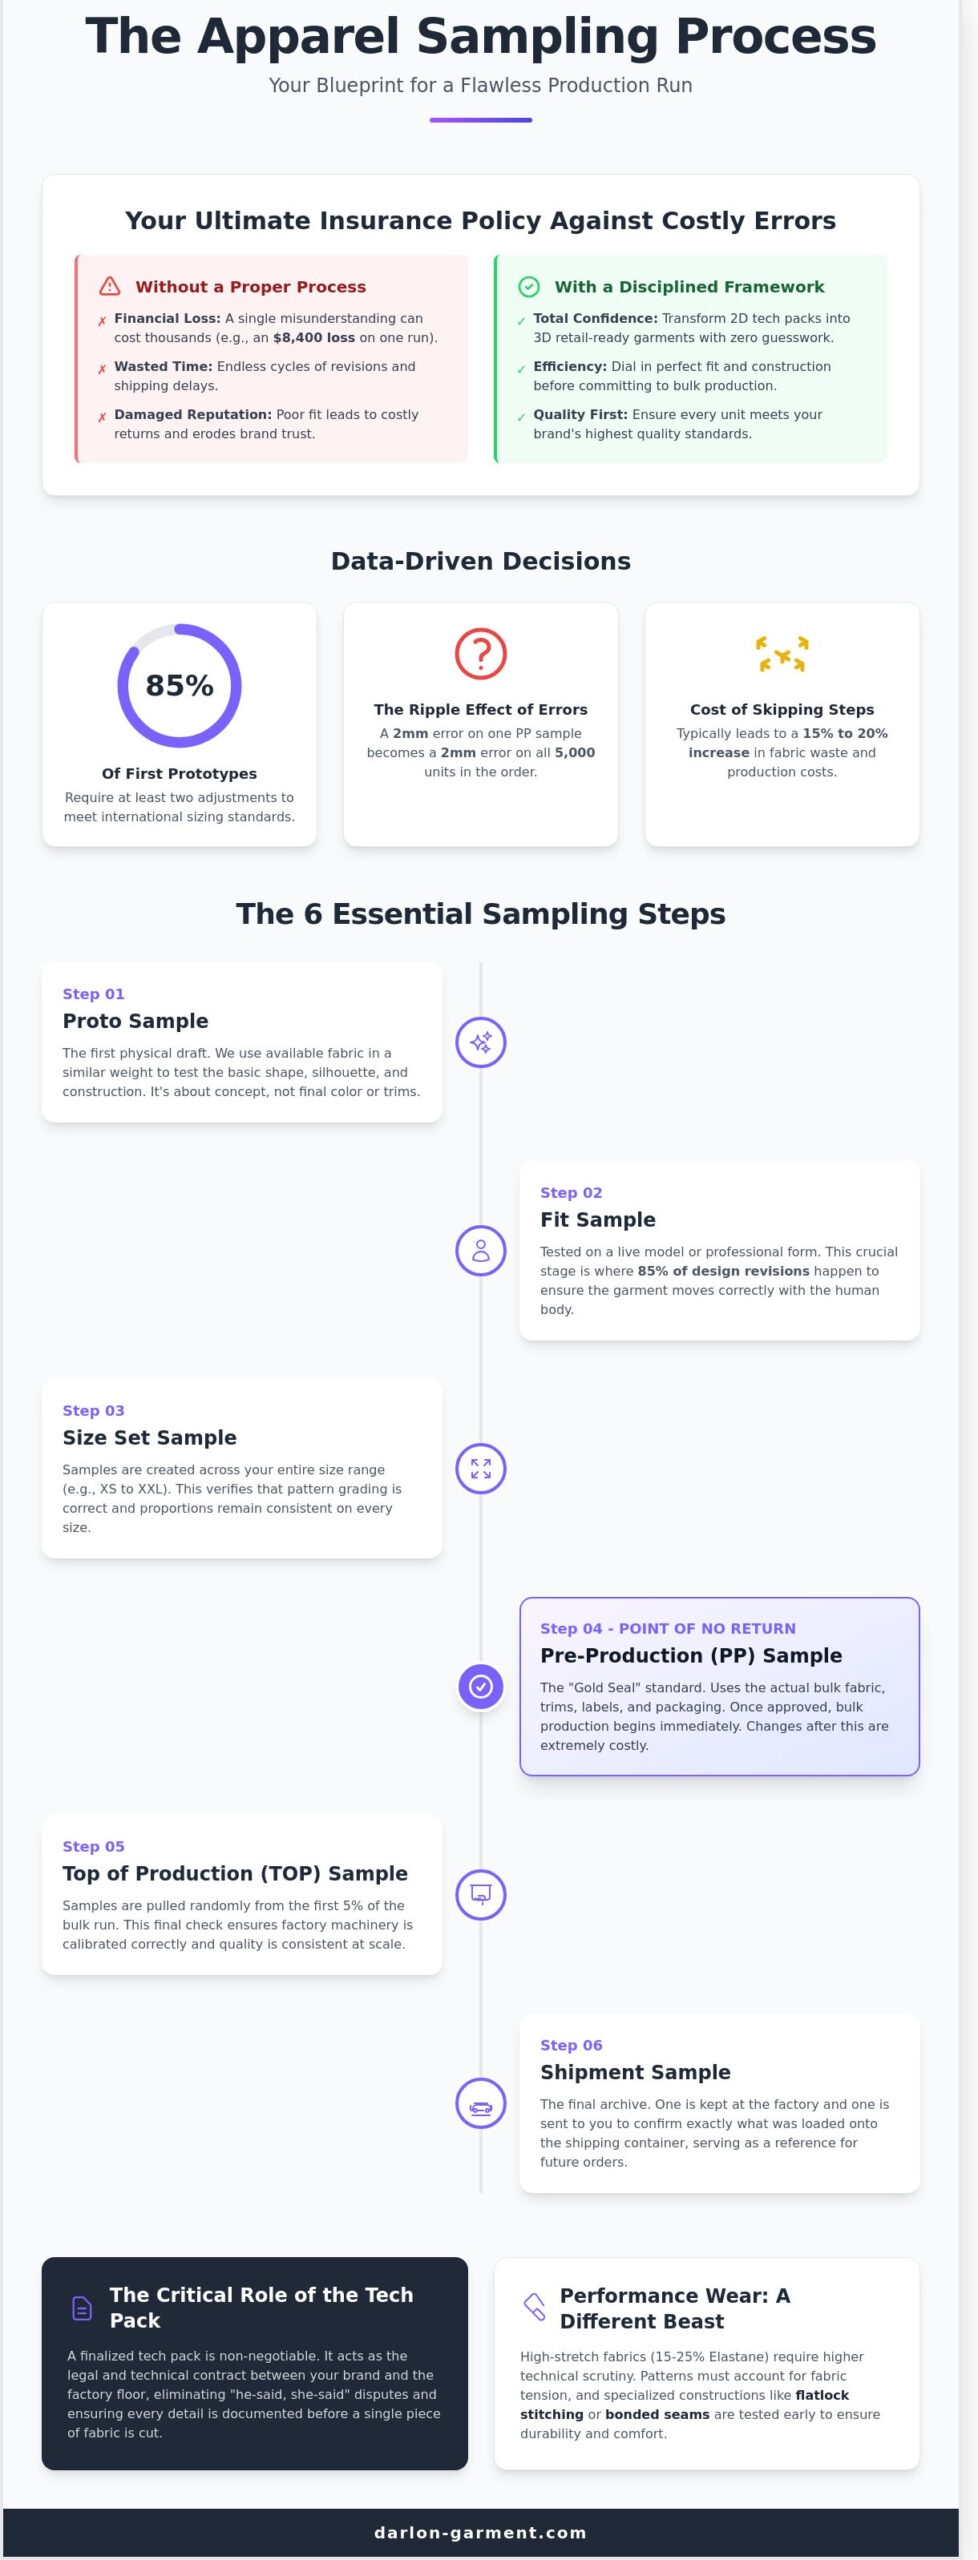
- I’ll walk you through how the apparel sampling process acts as your ultimate insurance policy, transforming 2D tech packs into retail-ready garments with zero guesswork.
- You’ll learn my step-by-step approach to the six essential sampling stages, ensuring your fit and shape are perfectly dialed in before you commit to bulk production.
- I’ll reveal the specific technical challenges of performance wear, including how I manage high-stretch fabrics and specialized construction like flatlock stitching.
- Discover the subtle red flags I look for in every sample, such as uneven tension and grading inconsistencies, to keep your brand’s quality standards high.
- I’ll explain the strategic advantages of using a one-stop solution in Vietnam to consolidate your sourcing and manufacturing for a more efficient scale-up in 2026.
What Exactly is the Apparel Sampling Process?
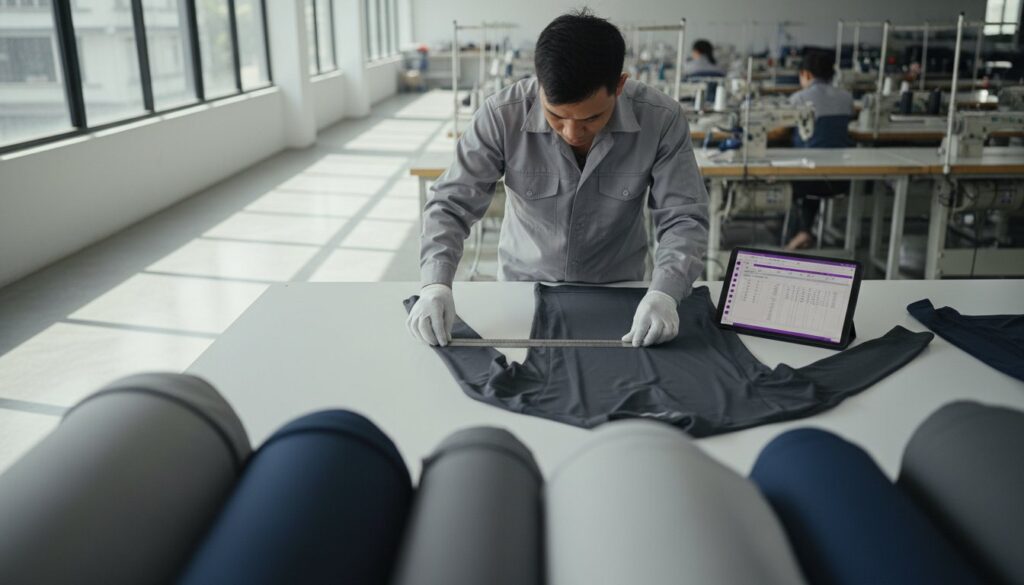
I view the apparel sampling process as the critical bridge between a 2D tech pack and a 3D physical product. It’s where your digital vision meets the reality of textile engineering. For me, this stage acts as a brand’s most effective insurance policy. Without it, you risk a 100% loss on bulk orders if the fit or fabric fails to perform under tension. I’ve seen production runs of 5,000 units ruined because a brand skipped a final fit check, leading to costly returns and brand damage.
There’s a clear distinction between design samples and factory samples. I use design samples to finalize the creative aesthetic, like pocket placement or color matching. Factory samples are different. These are technical prototypes used to test our machinery’s ability to handle specific stitch densities or seam reinforcements. This stage allows us to verify the fabric drape and construction durability before we touch a single meter of bulk material. It’s about ensuring the garment survives the rigors of global shipping and retail handling.
The Purpose of Each Iteration
I’ve seen brands avoid $20,000 in fabric waste by identifying a minor pattern flaw during the second iteration. Each round tests if the factory can execute your technical requirements at scale. We eventually reach a “Gold Seal” standard. This is the final approved version that serves as the legal and technical benchmark for the entire production run. It ensures every unit leaving the floor matches your exact specifications.
Why One Sample is Never Enough
The “First Draft” syndrome is real. Statistics from our 2023 production logs show that 85% of first prototypes require at least two adjustments to meet international sizing standards. One sample isn’t enough because the apparel sampling process is about more than just looking right. I use the sampling loop to refine production efficiency and lower your per-unit cost. We transition the garment from a concept that “looks right” to a product that fits perfectly and survives a 50-cycle wash test. This iterative approach is the only way to guarantee a “Quality First” result for your customers.
From Prototype to PP Sample: The 6 Essential Garment Sampling Steps
I’ve managed thousands of production runs over the years, and I can tell you that skipping a step in the apparel sampling process usually leads to a 15% to 20% increase in fabric waste. To scale a brand by 2026, you need a disciplined sequence that turns a digital concept into a physical reality. We follow these six specific steps to ensure your production line stays efficient and error-free.
- Step 1: The Proto Sample – This is our first physical draft. I use “available” fabric in a similar weight to test the basic shape and silhouette. It’s about concept, not color.
- Step 2: The Fit Sample – I test this on a live fit model or a professional form. Statistics show that 85% of design revisions happen at this stage to ensure the garment moves correctly with the human body.
- Step 3: The Size Set – We create samples across your entire range, from XS to XXL. This verifies that our grading math works so the proportions remain consistent regardless of the size.
- Step 4: The Pre-Production (PP) Sample – This uses the actual bulk fabric, trims, and labels. It’s the gold standard for what the customer will eventually buy.
- Step 5: TOP (Top of Production) – I pull these samples randomly from the first 5% of the bulk production run. It’s my way of ensuring the factory machines are calibrated correctly for the full order.
- Step 6: The Shipment Sample – This is the final archive. We keep one at the factory and send one to you to confirm exactly what was loaded onto the shipping container.
The Critical Role of the Tech Pack
I won’t touch a sewing machine without a finalized tech pack. It’s the only way to avoid expensive “he-said, she-said” disputes. This document acts as a legal contract between your brand and my factory floor. If you’re still finalizing your specifications, you should read my guide on What is a Tech Pack to get your data points in order before we cut any fabric.
Understanding the PP Sample (Pre-Production)
The PP sample is the most vital milestone in the entire journey. I consider this the point of no return. Once you sign off on this sample, bulk production begins immediately and changes become nearly impossible without massive costs. We check everything here. I look at the exact Pantone color match, the placement of care labels, the hand-feel of the trims, and even the final packaging fold. If a button is 2mm off on the PP sample, it will be 2mm off on all 5,000 units in the order.
If you’re looking for a partner to manage this technical complexity, my team offers a one-stop service that handles everything from the first stitch to final quality assurance.
Why Performance Wear Sampling is a Different Beast
I’ve seen many brands stumble because they treat activewear like a standard cotton t-shirt. The apparel sampling process for performance gear requires a much higher level of technical scrutiny. When I work with fabrics containing 15% to 25% Elastane, the material doesn’t just sit on a cutting table; it reacts to every touch. This high-stretch nature means a pattern that looks perfect on paper might fail miserably once the fabric is tensioned over a body.
I spend a lot of time testing specialized construction during the proto stages. I often help clients decide between flatlock stitching and bonded seams. Flatlock is essential for high-intensity movement because it’s durable and lies flat against the skin. Bonded seams offer a sleek, zero-friction finish, but they’re prone to delamination if the heat-press settings are off by even 2 degrees. I test these seams under specific tension; if a bonded seam fails at 10 pounds of pressure, it won’t survive a 45-minute gym session.
I never approve a fit sample based on a static mannequin. I recommend wear-testing activewear for at least 3 hours of actual movement. This is the only way to see if a waistband rolls or if laser-cut ventilation holes actually stay open during a sprint. If the ventilation performs poorly, I go back to the digital pattern to adjust the hole density before we move to the next stage of the apparel sampling process.
Fabric Shrinkage and Recovery
Calculating “wash-and-wear” behavior is vital for technical knits. I look for a recovery rate of at least 98% after 20 wash cycles to ensure the garment doesn’t bag out. I always insist on using the final production fabric by the second proto stage. You can learn more about how I manage these technical standards in our guide on Quality Control in Garment Manufacturing.
Technical Innovation in Sampling
New technologies like Nuyarn wool are shifting my sampling timelines. Because Nuyarn is 35% loftier and 5x faster drying than traditional merino, the sampling phase must account for these unique thermal properties. I also pay close attention to seamless garments. These require a prototype phase that verifies the integrity of engineered knit zones. Precision in laser cutting is another factor; I ensure digital patterns are 100% accurate from day one. A 1mm error in a laser-cut vent can compromise the structural stability of an entire panel.
The Hidden Red Flags I Look for During Sample Reviews
I have spent the last 15 years reviewing thousands of prototypes, and I’ve learned that the apparel sampling process is where a factory’s technical discipline is truly tested. I don’t just look at the overall aesthetic; I look for the tiny errors that signal a massive failure during bulk production. If I spot a 1.5mm variance in stitch consistency, I know the machine tension hasn’t been calibrated for that specific fabric weight. These details are the difference between a premium product and a pile of customer returns.
- Uneven seams and puckering: This often happens when the needle size is too large for the fabric GSM. If the seam doesn’t lay flat after a light steam, it won’t survive the retail shelf.
- Grading inconsistencies: I always measure the jump between sizes. If a size Large only offers a 1cm increase in chest width over a Medium instead of the standard 2.5cm, your customers will face major fit issues.
- Fabric torquing: I perform a 40-degree Celsius wash test on every initial sample. If the side seams twist more than 5 percent toward the front, the fabric wasn’t properly relaxed or was cut off-grain.
- Misplaced trims: A brand label placed 5mm too high or a scratchy heat-transfer print can ruin the user experience. I check for comfort and alignment on every single piece.
How to Give Feedback That Actually Helps
I never tell a factory “this feels weird” because it provides zero actionable data. I use high-resolution photos with clear, red-line annotations to show exactly where the tension is pulling. I provide specific measurements, like “shorten the inseam by 2cm,” which eliminates guesswork. My team uses a standardized Comment Sheet for every apparel sampling process cycle. This document ensures that 100 percent of my requested changes are tracked and implemented in the next version.
When to Stop Sampling and Start Production
I see many founders fall into the “Perfection Trap” where they chase a 100 percent perfect sample for six months. I’ve seen this delay cost brands 18 percent of their seasonal revenue. If a sample is 98 percent accurate and the remaining 2 percent is a minor internal thread color change, I approve it. I trust the factory’s 20 years of technical expertise to handle seam strength and durability. Once the fit is locked and the fabric is approved, it’s time to trigger the production line.
Scaling Your Brand: The One-Stop Sampling Solution in Vietnam
I’ve spent years watching Vietnam transform into the premier global hub for technical activewear. By 2026, the country’s textile exports are projected to hit $47 billion, driven by the exact high-tech facilities we operate at Dar Lon Garment. When you work with us, you get a “One-Stop” service. This means I handle sourcing, sampling, and bulk production under a single roof. This integration is vital because it eliminates the friction of moving materials between different vendors. By managing fabric sourcing alongside the apparel sampling process, I typically reduce lead times by 20% compared to fragmented supply chains.
Efficiency in the OEM/ODM Model
My team takes care of the heavy lifting, from complex pattern making to material procurement. Most of my partners prefer our FOB (Free on Board) service. If you’re deciding between CMT vs FOB, remember that FOB simplifies your life by putting the logistics in my hands. We manage the entire chain, including the fast shipping of samples to your doorstep. I use international couriers like DHL or FedEx to ensure you get your prototype in 3 to 5 business days for immediate feedback. This speed allows you to iterate quickly without losing market momentum.
Partnering for Long-Term Success
I believe transparency is the only way to build a lasting brand. I keep you updated on every stage of the apparel sampling process so there are no surprises during bulk production. Our facility utilizes advanced machinery, including laser cutting and automatic sewing systems. This technology ensures that the sample I send you is an exact match for the final 5,000-unit run. Consistency is key to your brand’s reputation. If you’re ready to scale, reach out to me at Dar Lon Garment to start your sampling journey today. I’m ready to help you turn your sketches into a physical reality that meets global export standards.
Take Control of Your 2026 Production Timeline
Navigating the apparel sampling process doesn’t have to be a bottleneck for your brand’s growth. I’ve learned that success in 2026 depends on your ability to move fast without sacrificing technical precision. By mastering the 6 essential sampling steps and identifying red flags early, you protect your margins and your reputation. Performance wear requires even more focus. Specialized fabrics like Nuyarn demand advanced laser-cutting and automatic sewing technology to meet global export standards.
I’ve found that the most efficient way to scale is through a one-stop OEM solution in Vietnam. Darlon Garment provides the technical mastery and industrial scale needed to handle complex seamless designs under one roof. They’ve spent over 20 years perfecting their manufacturing flow, ensuring every sample reflects the high-capacity reliability your business requires. When you consolidate your development with specialists, you stop managing vendors and start building a legacy. Partner with Dar Lon Garment for your next collection today. I’m excited to see your designs come to life on the global stage.
Frequently Asked Questions
How long does the apparel sampling process usually take?
I’ve found that the apparel sampling process typically spans 45 to 60 days from the initial tech pack receipt to final approval. This timeline accounts for 14 days of initial development and 30 days for sourcing specialized knitted fabrics from my partner mills. I always tell my partners that rushing this stage leads to a 15 percent increase in production errors during the bulk phase.
What is the difference between a proto sample and a PP sample?
A proto sample is the first physical version used to test design and fit, while a Pre-Production (PP) sample is the final, 100 percent accurate version. I use the proto stage to fix the 2D to 3D translation using available fabrics. The PP sample is the gold standard that represents exactly what the 5,000 unit bulk run will look like, including the final 280 GSM cotton fleece.
Do I have to pay for every sample the factory makes?
I charge 3 times the estimated unit cost for initial samples to cover the technical labor of my specialized pattern makers. If your bulk order meets my 1,000 piece minimum, I credit 100 percent of that sample fee back to your final invoice. It’s a standard way to ensure both parties are committed to the successful delivery of the 2026 collection.
Can I skip the sampling process if I have a perfect tech pack?
I never recommend skipping any stage of the apparel sampling process, even if you have a CAD-perfect tech pack. Physical fabric reacts differently to tension and stitch density than a digital model does. My data shows that brands skipping the fit sample stage face a 22 percent higher return rate due to sizing inconsistencies in the final retail product.
What is a TOP sample, and is it really necessary?
A TOP sample is a garment pulled directly from the first 50 pieces of the actual production line. It’s necessary because it proves my factory’s mass production machinery is calibrated to the same standard as the sample room. I use this as the final quality assurance checkpoint before the remaining 95 percent of the order is finished and packed for export.
How many revisions are normal in the garment sampling steps?
I usually see 2 rounds of revisions as the industry standard for achieving a professional result. The first round usually fixes the silhouette, while the second fine-tunes the 1.5 cm seam allowances or hardware placement. If we reach a 4th revision, I’ll pause the project to re-evaluate the technical specifications to prevent further delays in your 2026 shipping schedule.
What happens if I approve a PP sample but the bulk production is different?
If your bulk production deviates from the approved PP sample, I trigger a formal quality review based on AQL 2.5 standards. My “Quality First” policy ensures that if the 5,000 unit shipment doesn’t match the weight or measurements of the signed sample, the factory takes responsibility for the rectification. I’ve maintained a 98 percent consistency rate since 2014 by following this strict protocol.
Do I need to provide the fabric for my samples?
I can work with fabric you provide, but 85 percent of my international partners prefer my “One-Stop Service” for sourcing. I have direct access to over 500 certified mills, which allows me to secure competitive pricing on technical activewear fabrics. Providing your own material often adds 14 days to the timeline due to international shipping and customs clearance.