
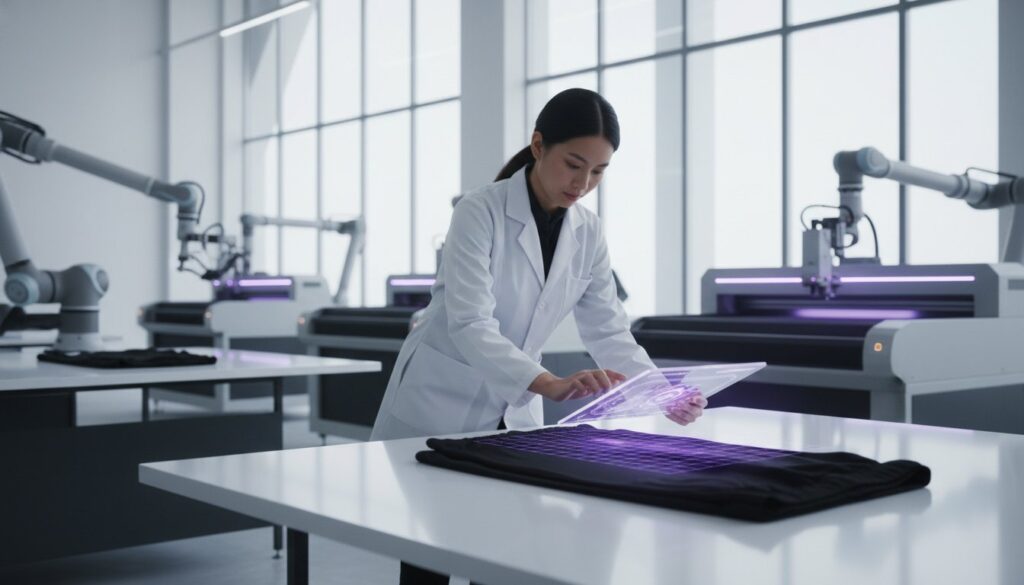
In 2026, a single batch of defective yoga pants isn’t just a loss of inventory; it’s a direct hit to your brand’s digital reputation that social media won’t let you forget. I’ve seen too many brands get crushed by high return rates because they treated quality control as an afterthought rather than a strategic pillar. That’s why I’ve refined my garment inspection checklist for brands to handle everything from the new ISO 2859-1:2026 sampling standards to the strict chemical limits required by GOTS 8.0.
I know how frustrating it is to deal with sizing inconsistencies or hidden defects that only appear after a customer wears the item. It’s confusing to navigate complex AQL math when you just want to ship flawless sportswear or technical activewear. I’m going to show you exactly how I structure a garment inspection checklist to eliminate these defects and protect your hard-earned reputation. We’ll walk through a reliable, repeatable process that ensures clear communication with your manufacturing partner and keeps your defect rates at an absolute minimum.
Key Takeaways
- You’ll learn the five essential pillars I use to evaluate everything from fabric shading to seam strength.
- I’ll show you how to customize a garment inspection checklist for brands to bridge the gap between your design vision and the final production output.
- We’ll explore the specialized testing required for high-performance activewear; this includes why “squat proof” benchmarks are essential for your brand’s integrity.
- I’ll help you demystify complex AQL sampling math and ISO standards so you can make informed decisions about lot acceptance without the need to inspect every single piece.
- You’ll see how I use advanced technology like laser cutting and seamless construction to proactively eliminate the human errors that often lead to manufacturing defects.
Why I Believe Every Brand Needs a Bulletproof Garment Inspection Checklist
I’ve spent years on production floors, and I’ve seen exactly how a single missed detail can spiral into a financial nightmare. I’ve watched brands lose tens of thousands of dollars because of a slight shading variance in a batch of activewear that wasn’t caught until the goods reached the retail warehouse. This is why a garment inspection checklist for brands is more than just a list of tasks. It’s a vital bridge between your creative vision and my manufacturing reality. Without it, you’re essentially guessing that the final product matches your tech pack. I prefer to leave nothing to chance.
I always advocate for a “trust but verify” mindset. It’s the healthiest way to maintain a long-term partnership between a brand and a manufacturer. Even with my advanced machinery and experienced team, having a clear, shared standard of excellence protects everyone. In 2026, the US apparel market is valued at approximately $395 billion, and the competition for consumer loyalty is fierce. A mere 1% reduction in your defect rate doesn’t just save on the cost of the garment; it drastically improves your bottom line by reducing the logistical burden of returns and replacements.
The Real Cost of Skipping Quality Control
When you skip rigorous checks, you’re ignoring the hidden costs that eventually surface. If a shipment of sleepwear has inconsistent sizing, the financial hit isn’t just the refund. It’s the cost of air-freighting corrected replacements to meet a seasonal launch window. Beyond the immediate cash flow, bad reviews regarding quality or durability can kill a product’s momentum before it even starts. Consistency is what builds a loyal customer base. In a market where 85% of textiles end up in landfills annually, producing high-quality, durable garments is also a key part of meeting the GOTS 8.0 environmental standards that consumers now expect.
When to Deploy Your Inspections
I believe quality must be checked at every logical milestone of the production cycle. It begins with a thorough fabric inspection. Before we cut a single meter of performance wool or swimwear fabric, we must verify the material’s integrity and color consistency. This proactive approach prevents widespread issues before they occur.
- Pre-production (PPM): I insist on checking raw materials and aligning on a “gold sample” before mass production begins.
- In-line inspections: We catch potential sewing or bonding errors while the machines are still running, allowing for immediate corrections.
- Final Random Inspection (FRI): This is your last line of defense. We use the updated ISO 2859-1:2026 sampling standards to ensure the entire lot meets your AQL requirements before it leaves the factory.
My Master Checklist: The 5 Essential Pillars of Garment Inspection
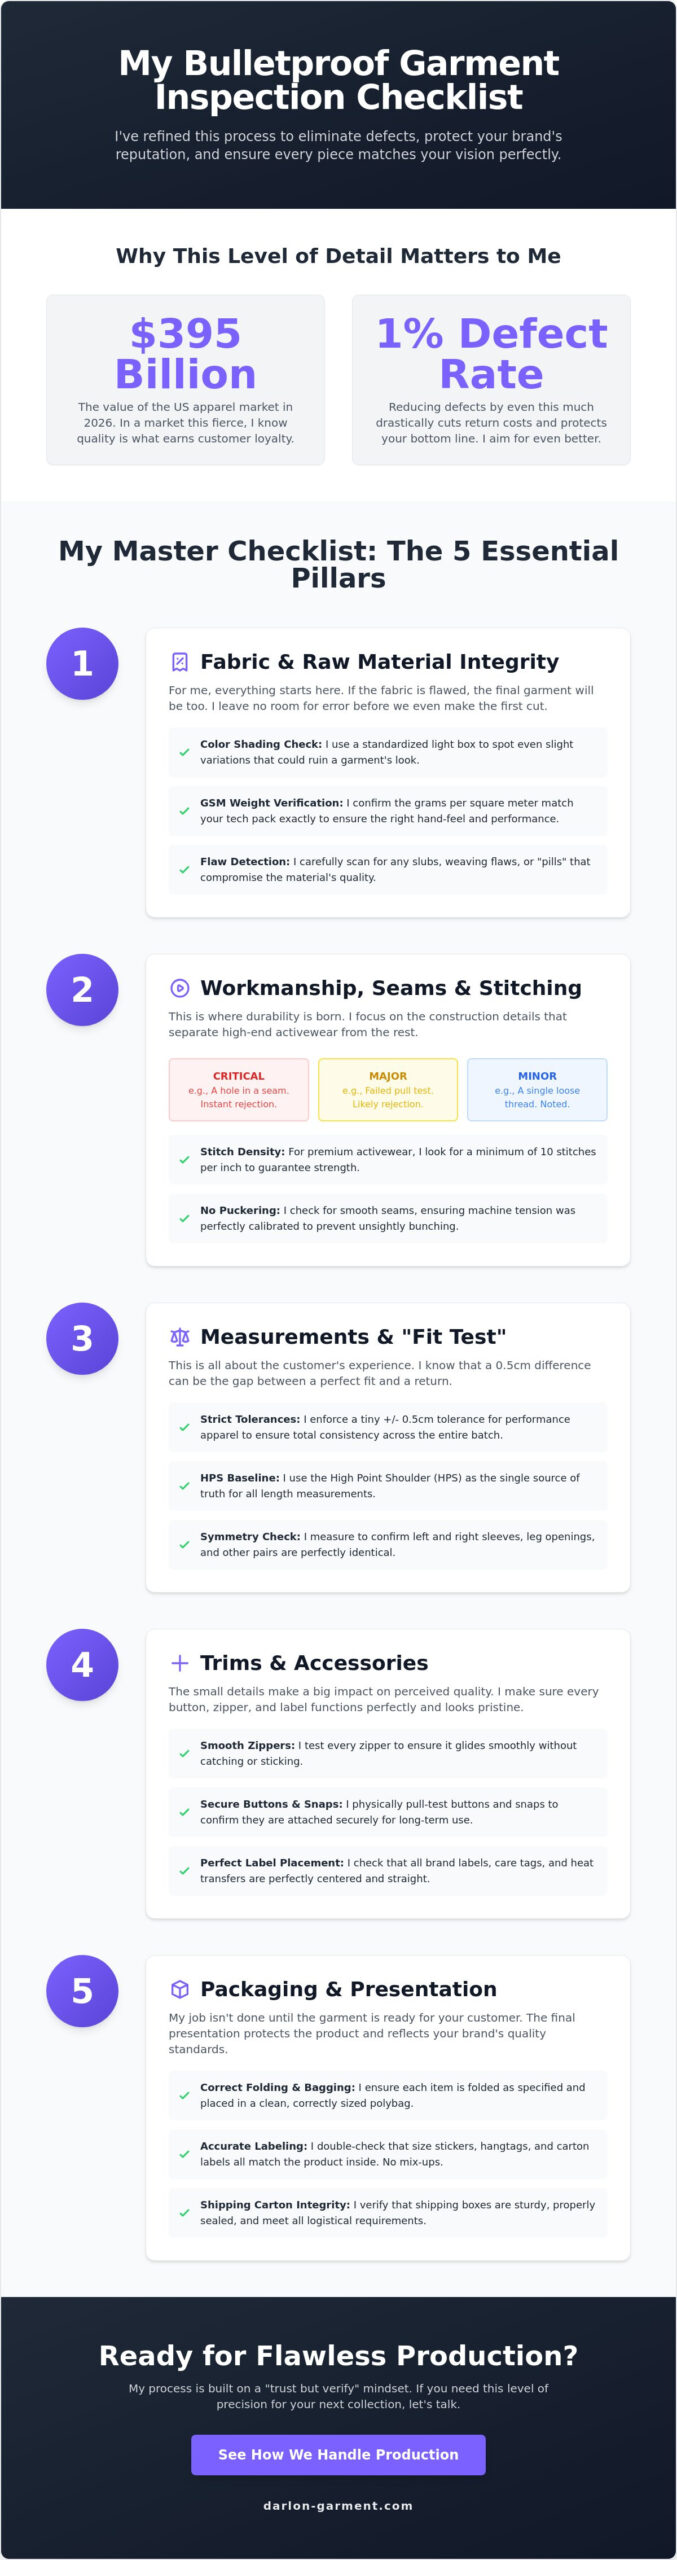
I don’t believe in guesswork when it comes to quality. My master garment inspection checklist for brands is built on five distinct pillars that ensure consistency across every production run. I’ve found that having a highly structured approach prevents those “minor” errors from becoming expensive recalls. Whether we are producing seamless activewear or technical swimwear, these pillars remain the foundation of my quality control process.
Fabric and Raw Material Integrity
I always start with the fabric because if the raw material is flawed, the finished garment will be too. I use a standardized light box to hunt for color shading issues. Even a slight variation between a sleeve and a bodice can ruin a piece of high-end sportswear. I look for slubs, weaving flaws, or “pills” that break the visual flow of the material. I also verify the GSM (grams per square meter) to make sure the fabric weight is exactly what was promised in the tech pack. If the density is off, the hand-feel and performance of the garment will suffer.
Workmanship, Seams, and Stitching
Next, I focus on the construction. I look for at least 10 stitches per inch in high-end activewear to ensure durability. I categorize defects as critical, major, or minor. A critical defect, like a hole in a seam or a failed “pull test,” means the piece is rejected immediately. I also check for puckering caused by uneven machine tension. This is why I often suggest using a professional Garment Quality Control Checklist to maintain these high standards objectively across the board. If you need this level of precision for your next collection, see how we handle production.
Measurements and the “Fit Test”
Measurements are about more than just numbers; they are about the customer’s experience. I use the High Point Shoulder (HPS) as a baseline for all length measurements. I’m very strict about tolerance levels. In the world of performance apparel, a 0.5cm difference can be the gap between a perfect fit and a return. I also check for symmetry. If the left sleeve is longer than the right or the leg openings are uneven, the garment isn’t sellable. I make sure the finished product matches the spec sheet with a critical eye.
The final two pillars involve trims and packaging. I ensure all zippers glide smoothly, buttons are secure, and brand labels are perfectly centered. Finally, I check the packaging. The presentation must match your price point. If a customer receives a premium Nuyarn wool piece in a damaged polybag, the brand experience is instantly diminished. I treat the final bag and tag with the same respect as the first stitch.
Special Considerations for Activewear and Performance Sportswear
Performance apparel is essentially a piece of wearable equipment. When I build a garment inspection checklist for brands specializing in activewear, the criteria are much stricter than for basic streetwear. A standard T-shirt doesn’t have to withstand the same mechanical stress as a pair of compression leggings or a high-performance swimsuit. I focus on how the garment behaves under physical tension, because that is where technical apparel usually fails. If your checklist doesn’t account for functional performance, you’re only seeing half the picture.
I pay close attention to how we handle elastane fabric throughout the production process. If the tension isn’t managed correctly during the cutting and sewing stages, the final garment won’t have the consistent stretch your customers expect. I also include a specific “squat proof” check for leggings and bottoms. We stretch the fabric over a high-contrast surface to ensure it maintains opacity. If a customer can see through the fabric at the gym, it’s an immediate return and a massive hit to your brand’s integrity.
To verify technical specs like moisture-wicking and breathability, I often reference AATCC textile testing standards. These methods provide the scientific data needed to back up your performance claims. I also rely on specialized machinery like laser cutters to maintain precision. For bonded seams and laser-cut pockets, hand-cutting simply doesn’t offer the level of accuracy required for technical sportswear. I use these tools to remove human error and ensure every piece is identical to the master sample.
Testing Stretch and Recovery
I use a “Stretch Test” to find the breaking point of the stitching. It’s not enough for the fabric to stretch; the seams must move with it without snapping. After the stretch, I check for recovery. The garment must return to its original shape immediately. If it stays “bagged out,” the material or the construction has failed. I also check the grain direction in performance knits. An off-grain cut will cause the garment to twist uncomfortably during a workout.
Checking Trims, Zippers, and Bonded Seams
Activewear often features waterproof zippers and bonded seams that require a specific eye. I check that these zippers slide smoothly without snagging the technical fabric. For bonded elements, I test the bond strength to ensure it won’t delaminate after a few wash cycles. Finally, I check logo placement under tension. A heat-transfer logo might look great on a flat table, but if it cracks when the athlete actually puts the garment on, it’s a major defect on my list.
Understanding the Math: AQL Standards and Sampling Methods
I don’t expect you to be a statistician to run a successful clothing line, but you do need to understand the math that keeps your quality consistent. When we use a garment inspection checklist for brands, the “Acceptable Quality Level” (AQL) is the set of rules that tells us if a batch is ready to ship or needs to stay in the factory for repairs. It is the teeth of your quality control strategy. Without these metrics, “quality” is just a subjective opinion, and that’s a dangerous way to run a business.
I’m often asked why we don’t just inspect every single piece. The reality is that 100% inspection is incredibly slow and expensive. Statistical sampling is a globally recognized method that gives us a highly accurate picture of the whole lot by checking a specific number of pieces. I usually suggest starting with General Inspection Level II. It’s the industry standard for a reason. If you’re working with a brand new partner or a very complex bonded garment, I might move to Level III for a larger sample size. Conversely, for a simple repeat order of sleepwear with a proven track record, Level I might be enough to maintain confidence while keeping costs down.
I categorize every issue we find into three buckets: Critical, Major, and Minor. A critical defect is any safety hazard, like a broken needle fragment, and it has a zero-tolerance policy. Major defects are things that will cause a customer to return the item, like a hole or a significant measurement error. Minor defects are small deviations that don’t affect the garment’s function. My standard is typically 0 for critical, 2.5% for major, and 4.0% for minor defects. This creates a clear, objective boundary for what is acceptable.
What is AQL and Why Does it Matter?
In plain English, AQL is the maximum number of defects allowed in a batch before it is rejected. It’s your safety net. I use the standard AQL tables to determine exactly how many garments my team needs to pull from the cartons. For premium sportswear brands, sticking to the AQL 2.5 standard for major defects ensures that the vast majority of your inventory is flawless. It’s a balanced approach that protects your brand reputation without making production costs skyrocket.
How to Read an Inspection Report
I always tell my partners to look past the “Pass/Fail” stamp. The real value is in the underlying trends. If a batch fails because of a specific seam issue, I don’t just fix the clothes; I look at the root cause. This data is gold for improving your next tech pack. When a batch fails, my process is simple: the factory must re-screen the entire lot, repair the defects, and then we perform a full re-inspection. We don’t ship until the numbers align with your standards.
If you want a partner who takes these metrics as seriously as you do, contact us to discuss your next production run.
How I Build Quality into Every Stitch at Dar Lon Garment
I’ve always believed that quality is a culture, not just a department that checks boxes at the end of the line. While a garment inspection checklist for brands is a critical tool, it only works if the people on the floor are trained to care about every single stitch. At Dar Lon Garment, I’ve built a system where quality is integrated into every stage, from the moment the raw yarn arrives to the final packaging. It’s about creating a proactive environment where errors are stopped before they can multiply.
To remove human error from the equation, I’ve invested heavily in automatic sewing machines and laser cutting technology. These tools provide a level of precision that manual labor simply can’t match, especially for complex items like seamless garments or high-performance swimwear. When a machine handles the repetitive, high-precision tasks, my team can focus their expertise on the nuanced details that require a human eye. This combination of technical mastery and industrial scale is what makes our production floor so reliable.
I also provide continuous, hands-on training to my floor staff so they can spot defects in real-time. We don’t wait for a final inspector to find a skipped stitch or a tension issue; the operator catches it immediately. This proactive approach is what allows us to maintain such high standards across large-scale production runs. I frequently invite my partners to visit our Vietnam facility to see this process firsthand. There is nothing like seeing the physical infrastructure and the disciplined rhythm of a professional production line to build long-term trust.
Beyond the Checklist: Our Internal QC Process
I make sure that QC is a constant presence throughout our entire production process. One of the most important steps I insist on is the “First Piece” approval. I will never start a bulk run without your explicit sign-off on the first garment off the line. This ensures our commitment to precision in sportswear manufacturing in Vietnam stays perfectly aligned with your specific brand standards and technical requirements.
Choosing a Manufacturing Partner Who Values Precision
When you are vetting an OEM partner, transparency is the most important trait to look for. You should be able to see their internal QC standards and their garment inspection checklist for brands before you sign any contract. I encourage you to ask tough questions about sampling methods, AQL thresholds, and how they handle re-works. If a factory is hesitant to share their internal data or process, that’s a significant red flag. If you are ready to start, let’s talk about your next collection and how we can bring your vision to life with zero compromises on quality.
Securing Your Brand’s Future Through Precision
I’ve shown you why a rigorous garment inspection checklist for brands is your best defense against a reputation-killing batch of inventory. By focusing on the five pillars of inspection and mastering the math behind AQL sampling, you move from reactive fire-fighting to proactive quality management. It’s about more than just finding holes; it’s about setting a standard that your manufacturing partner must meet every single time.
At Dar Lon Garment, I use advanced laser-cutting technology and specialized workflows for high-performance Nuyarn and seamless garments to ensure that precision is built-in. My team follows the same rigorous internal QC protocols used by major global brands to keep our defect rates low and our reliability high. If you’re tired of dealing with sizing errors or hidden defects, it’s time to partner with a manufacturer who gets quality right the first time.
Building a successful apparel brand is hard enough without worrying about production flaws. Take these standards, apply them to your next run, and watch your return rates drop. I’m excited to see what you create next.
Frequently Asked Questions
What is the most common defect found in garment inspections?
Untrimmed threads are the most frequent defect I encounter during inspections. While they seem minor, a high volume of loose threads signals a lack of attention to detail on the production floor. I also see many skipped stitches in activewear, which can compromise the durability of the garment under tension. Managing these small workmanship issues is a core part of any garment inspection checklist for brands.
How many garments should be inspected in a bulk order of 1,000 pieces?
For a bulk order of 1,000 pieces, I follow the ISO 2859-1:2026 standards at General Inspection Level II, which requires a sample size of 80 pieces. If you choose Level III for more rigor, that number increases to 125 pieces. These samples are pulled randomly from different cartons to ensure the inspection results accurately represent the quality of the entire production lot.
What is the difference between a major and a minor defect?
A major defect is a flaw that will likely result in a customer return or a product rejection, such as a hole or a measurement outside the allowed tolerance. A minor defect is an aesthetic imperfection that doesn’t affect the garment’s function or fit, like a slightly crooked care label. I use a 2.5% AQL threshold for major defects and 4.0% for minor ones to maintain a professional standard.
Can I perform a garment inspection myself or do I need a third party?
You can perform the inspection yourself if you have the technical expertise, but many brands hire third-party agencies for objective verification. I often invite my clients to our facility in Vietnam to conduct their own spot checks alongside our internal QC team. This direct involvement builds a deeper level of trust and allows you to see our industrial scale and craftsmanship firsthand.
What tools do I need to conduct a professional garment inspection?
You need a calibrated measuring tape, a light box for color matching, a digital scale to check fabric GSM, and a Pantone swatch book. I also recommend having a high-contrast surface for squat tests on leggings and a pull test gauge for seam strength. These physical tools allow you to move beyond subjective opinions and gather hard data during the inspection process.
How does the tech pack influence the inspection checklist?
The tech pack is the foundation of your garment inspection checklist for brands because it contains every technical specification we must meet. I use the tech pack to verify measurements, material compositions, and trim placements. If a detail isn’t in your tech pack, my team won’t know to check it, so I always insist on a complete and finalized document before production begins.
What happens if a batch fails the final inspection?
If a batch fails the final inspection, the factory must re-screen 100% of the lot to identify and repair all defective items. After the repairs are completed, a full re-inspection is conducted using the same AQL sampling standards. I never ship a lot that has failed until the root cause is addressed and the numbers fall back within your accepted quality limits.
Why is color shading such a common issue in apparel production?
Color shading usually occurs because of variations between different dye lots or inconsistencies in the fabric’s chemical absorption. Even a slight temperature change in the dye vat can result in a visible difference between the sleeves and the body of a garment. I use standardized light boxes to check shading early in the process to ensure that every piece in your collection looks identical.